
Using an existing sea cable
-
Preparation of the new bioscope:
-
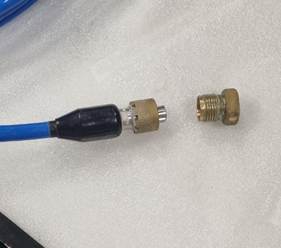
Remove the sea cable if it is attached to the new bioscope. Unscrew the brass connector counter-clockwise. This should be possible without using any tools. Remove the tape from the steel ring.
-
Remove the clamp on the back of the bioscope. Unscrew the two screws using a 5 mm Allen key.
-
-
Turn off the power using the switch located on the side of the cabinet on the cage.
-
The diver brings the end of a long rope (>30 m) from the surface down to the zipper opening.
-
The diver pulls up the bioscope and attaches the rope to the steel ring above the bioscope.
-
Loosen the suspension rope from the ring above the bioscope or from the air dome, depending on what is most suitable.
-
Bring the bioscope with the steel ring and sea cable through the zipper in the net and up to the surface (using the rope pulled by personnel on the surface) and place it on the walkway.
-
Remove the existing sea cable and attach it to the new bioscope. Tighten the cable as firmly as possible by hand. Use a 5 mm Allen key on the cable mount on the back of the housing and secure the steel ring with high-quality insulation tape. Leave 0.5 m of slack on the cable between the housing and the steel ring.
-
The power can now be turned on, and the new bioscope can be deployed and lowered using the rope.
-
The diver receives and installs the bioscope in reverse order (steps 2-6).
Using a new sea cable
-
Preparation of the new bioscope:
-
Remove the sea cable if it is attached to the new bioscope. Unscrew the brass connector counter-clockwise. This should be possible without tools. Remove the tape from the steel ring.
-
Remove the clamp on the back of the bioscope. Unscrew the two screws using a 5 mm Allen key.
-
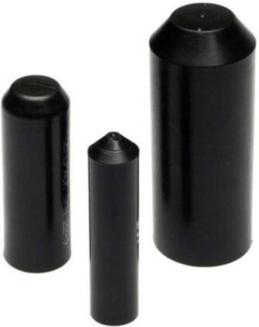
Attach a watertight protective cap to the cable end.
-
-
Preparation of the bioscope being replaced:
-
Turn off the power using the switch on the side of the cabinet.
-
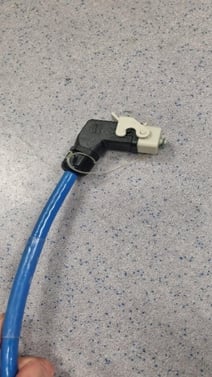
Remove the cable from the cabinet and make the cable end watertight using a bag, heat-shrink tubing, or similar.
-
-
Tape together the upper end of the old cable with the lower end of the new cable.
-
The diver brings the end of a long rope (>30 m) from the surface down to the zipper opening.
-
The diver pulls the old bioscope up to the top of the net and attaches the rope to the steel ring above the bioscope.
-
Loosen the suspension rope from the ring above the bioscope or from the air dome, depending on what is most suitable.
-
Bring the bioscope with the steel ring and sea cable through the zipper in the net and up to the surface (using the rope pulled by personnel on the surface) and place it on the walkway.
-
Start pulling up the cable behind the bioscope being replaced. At the same time, the taped cable joint is fed down into the water. Secure the upper connector of the new cable so that it does not enter the water. Continue pulling up the old cable while the new cable is fed out in a controlled manner without coiling. The diver ensures that the taped joint does not get caught in the cable entry at the top of the net. Pull until the taped joint reaches the handrail.
-
Lift the joint, remove the protective cap from the new cable, and attach it to the new bioscope. Tighten the cable firmly by hand. Use a 5 mm Allen key on the cable mount on the back of the housing and secure the steel ring with insulation tape. Leave 0.5 m of slack between the housing and the steel ring.
-
The power can now be turned on, and the new bioscope can be deployed and lowered using the rope to the diver.
- The diver attaches the suspension rope to the air dome or net roof and lowers the bioscope through the zipper. Ensure that excess sea cable does not hang in front of the camera.
See also What should the diver check when deploying the bioscope?