
How to install the bioscope in the pen?
Components
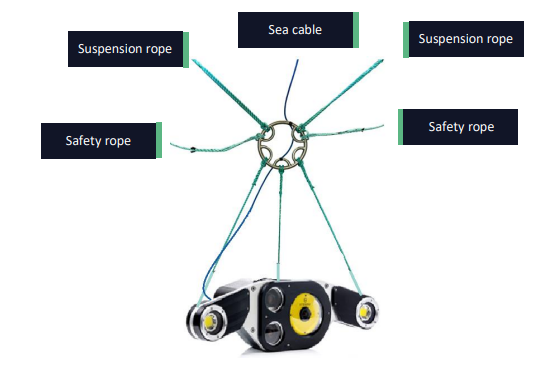
The equipment mainly consists of three parts:
- Bioscope
Sea cable (25m)
Steel ring with rope - Ropes
2 suspension ropes
2 safety ropes - Cabinet
- Power cable (50m)
Installation:
First, install the cabinet:
Find a suitable position on the handrail where a post is available. Make sure the power cable can reach to power distribution cabinet on the pen (max 50 meters).
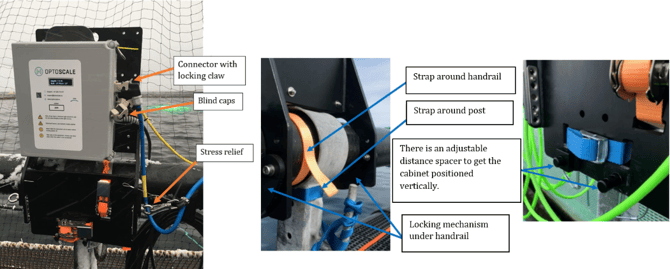
Place the bracket over the handrail by a post and secure it with:
- One "half-moon" on each side underneath the handrail
- One ratchet strap around the handrail
- One ratchet strap around the vertical post
Connect the sea cable from the bioscope to the cabinet, and snap the protective end caps together. Finally, attach the strain relief to the bracket. Note: The cabinet must be switched off.
Deploying the bioscope
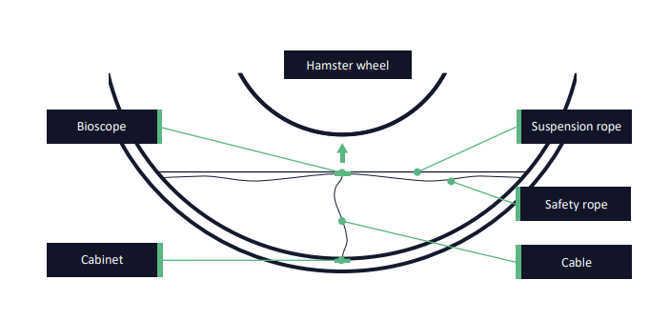
- From the cabinet, count the same number of posts in each direction (8 posts on a 160 m ring). This is where the suspension ropes and safety ropes must be attached.
- The suspension ropes must be the same length on both sides and are marked with tape every 5 meters. The sea cable and the safety ropes must be slack.
- The bioscope should face toward the center of the pen and be placed at the depth where the fish usually schools when they are not being fed.
Activate the bioscope
Once the installation is complete, the bioscope can be switched on by flipping the red switch on the cabinet. The bioscope ID number (4 digits shown on the camera housing) must be linked to the pen number in the web portal to ensure that measurements are uploaded correctly. Complete the reassignment in the web portal or contact us for assistance.